Sunday, 1 February 2015
On Sunday, February 01, 2015 by Nabin Jaiswal in PC-Tips-N-Tricks, Tips N Tricks, Windows No comments
 Disk partitioning means the act of dividing your hard drive into multiple volumes. By doing so, you can create as many partitions as per your requirements. You can partition your drive using various 3rd party software. However, in this article I will teach you how you can effectively partition your hard drive without any software.
You don't need any advance skills. You can do it by following few easy steps mentioned below.
Process of Disk Partition
Step 1: Right Click on 'My Computer' icon and Select 'Manage' as shown below.
Step 2: Click on 'Disk Management' located at the bottom.
OR
You can also directly open Disk Management with Shortcut command.
Step 1: Open Run ( Win key + R) and
Step 2: Type 'diskmgmt.msc' and press Enter.
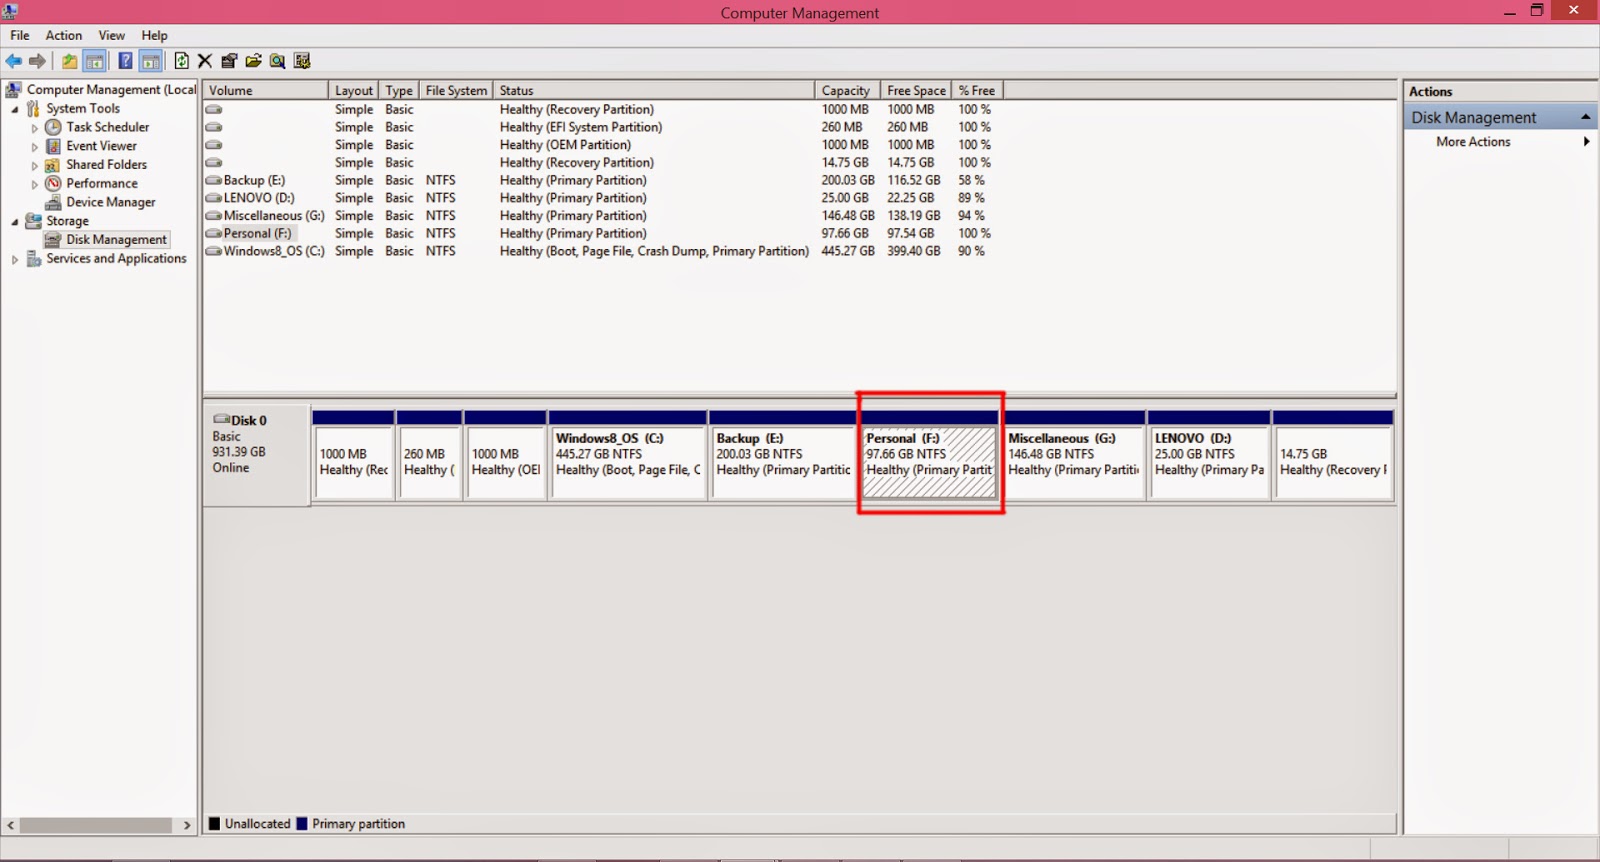
Step 3: Now select the volume you want to partition. I am partitioning my F: drive. Right click on it and select Shrink.
Step 4: Now enter the amount of space to shrink in MB and click on Shrink. For example: 50 Gb = 50000MB
You can see in the image below, you can see that 96 GB F: drive space has been reduced to aprrox 50GB (highlighted in Red) and the remaining space can still be used to create another partition or extend other drive space.
Process for extending your Drive
Step 1: Right click on the drive you can to extend and select 'Extend'.
Step 2: Enter the amount of space in MB that you want to extend and click on Next. You're done.
I extended my F: drive. You can see below.
Conclusion: I performed the disk partition in Windows 8.1. You can follow the same procedures in previous version of Windows. The best thing is that you can create new partition even from drive with files and extend them in Windows 8.1 which was not possible in Window 7 and Window XP without using any software.
If you have any queries then comment below. I will be always there to solve your issues.
Subscribe to:
Post Comments (Atom)
Search
Follow us on FB
Popular Posts
-
Hey friends , if you interested to learn C/C++ in you android device then CppDroid can help you. By using this app you can easily write...
-
In the recent times,backing up the files online is the latest way to store the personal files and folders.Files stored in cloud are more se...
-
At present, it's better to learn different languages so that it can be helpful for you. Besides, your mother tongue you must be much...
-
There are many apps that provide free calls by offering free credits. However, after the free credits are over you need to purchase the cr...
-
Are you guys looking for PC games? As it is known to you that in today’s world 3D gaming has earned much popularity in different platfo...
-
Hey Guys! Welcome to the new tutorial. In this , you will learn to create a password protected software without any software. Most of us, ...
-
If you own an iOS device, then you must know that by default you have to set 4 digit numeric passcode. But there is also a feature availab...
-
Were you ever eager to know the saved passwords in your iOS device ? Sometimes you might also want to know the passwords that your pare...
-
Microsoft's Windows 7 ,released on July 22,2009, was a great success and was largely accepted by its user worldwide. After few years, ...
-
I love the way the Windows Start Menu allow me to access the applications easily in My PC. Have you ever wish for search Start Menu for you...
Technowing. Powered by Blogger.


0 comments:
Post a Comment