


Saturday, 20 December 2014

Smartphones are really cheap these days. Many of us own android phones. Some of you might own more than one smartphones. To manage your smartphones, there is official software from the manufacturer company. For example, using Nokia PC suite you can manage your Windows phones, using Samsung Kies you can adjust the settings of your samsung device and using iTunes your can easily backup, restore your settings of your iOS device. There is one limitation of these software i.e you can manage only one device at a time. I personally own Samsung Tab 3 (android) and iPhone 4S (iOS). To manage them, I used to use Samsung Kies and iTunes separately. So, I was searching for one specific software that would allow me to manage all my devices at a same time and found an awesome software called "MOBOROBO". I can easily manage my both iOS and android device at same time. Besides, this faciliates to manage multiple devices even more than two at same time.
In this post, I will be sharing my knowledge regarding this software how you can easily manage your device.
Managing your Android Device
At first download this software: Moborobo. It is an open source software. After the download is finished, install the software and launch it.
Here's the user interface of this software.

In the top, you can see Home, Data, Apps, Images, Music, Videos and Themes menu. In the center, you can see your connected device and list of operations you can perform.
In the top right postion, you can see some icons using which you can manage the settings of this software. You can change the language from English into other 7 different languages as shown below:

In the same icon, you can manage the setting of your device too. Click on Setting to explore more.

You can specify the locations to store the downloaded apps, wallpapers, ringtones, music, videos and themes.

Using App menu inside this setting, you can change the default installation of apps to SD card, filter the duplicated apps, and manage export setting.

Review the remaining Setting menu such as App installer, Mobo Portal and other settings yourself.
Now lets to return to 'Home' menu.
Here you can see the detail information of your connected device by clicking on the small icon 'i' as shown below:

You can also check your SD card statistics on clicking on SD Card.

The File Manager option, allow you to quickly access the files and manage them easily.

You can also backup your device Contacts, Messages, Call logs, Images, Wallpaper, Theme, Music and Apps and even Restore them whenever necessary.

When you connect android device, you will also get an option of 'Phone Cleanup'. Using this option you can easily clean the temporary files and improve the device performance.

In the bottom right, you will see some icons. By clicking on them, you can access your contacts, messages, apps, images, music and video.

Now, lets discuss about 'Data' menu.
In this section, you review your contact lists, messages and call logs.You can edit and even add contacts from this menu.

Check the remaining portion yourself. It's very simple.
Now, it's turn for 'Apps' menu.
This is the most important feature of this software. You can manage your installed apps, system apps and even search, install and updates the application on your device. It also facilates to move your installed apps from Device to SD card or vice versa. Here's the perview.

If you have internet connectivity, then you can see the trending apps, download them and install them on your device.

If you search for any application, it also provides you with some suggestions at the bottom. You can see the preview below:

While downloading the applications, you can check the status by clicking on the icon highlighted as shown below:

Now, lets discuss about 'Images' Menu. In this section you can view your device images and even download wallpapers from the store.

In 'Music' section, you can manage your ringtones and audio files. It also shows trending music which you can play and download.

In 'Videos' menu, you can view different trending videos online and can even download them.

'Themes' menu allows you to download the themes for your devices. It shows the featured themes.

Managing your iOS device
As I mentioned before, this software works smoothly with android and iOS. You can easily manage your iOS device like that of Android device.
Here's the user interface of Moborobo after you connect your iOS device.

You can view your device information as mentioned above in Android.

There's one difference. You won't get 'Phone Cleanup' option. Rest is similar. You can backup and restore your important contacts, apps, messages, images and music.


Using File manager, you can see the contents of your device, and access files of 'File Sharing Apps'.

The rest is similar Android in Data, Apps, Images, Music, Videos and Themes menu.
You can easily download and updates your apps, add and delete music files, add, edit and delete your contacts.
Note: iOS device has certain restriction in comparison to Android. You cannot apply themes. You might not easily create folders.
I mentioned earlier that you can switched between your devices. You can do as shown below:

Conclusion: Moborobo is really awesome software. Using it, you can easily manage your multiple device at the same time. It's far better than Samsung Kies and iTunes in my opinion. When I connected my Nokia Lumia 920 (Windows), it couldn't recognize it.
Was this post helpful for you? If yes, please let me know through your valuable comments below.
If you have any queries or suggestions for you, please forward them without any hesitation. We will be grateful towards you. You can also request us to write articles on any specific topics. We will be happy to serve you.
Friday, 19 December 2014
 If you own an iOS device, then you must know that by default you have to set 4 digit numeric passcode. But there is also a feature available for you to set alpha-numeric passcode about which many of us are unaware. For this, you don't need any kind of applications and there's no need to jailbreak your device. In this post, I will show how you can easily set up alphanumeric passcode in just 4 easy steps.
Lets get started..
Process:
I have shown you a preview of 4 digit passcode on my iOS device.

Step 1: At first, go to Setting and select Passcode as shown below. (My iOS version is 7.1.2. In order version of iOS below 7, you can find Passcode menu inside General.)

Step 2: There you can see 'Simple Passcode' enabled. Make sure you Turn it Off.

Step 3: Then you are prompted to enter your old 4 digit passcode. Enter it.

Step 4: Now you can set alpha-numeric passcode according to your wish. When you click on highlighted '.?123', you will get an option to enter numbers. You have to enter same passcode twice and you're done.

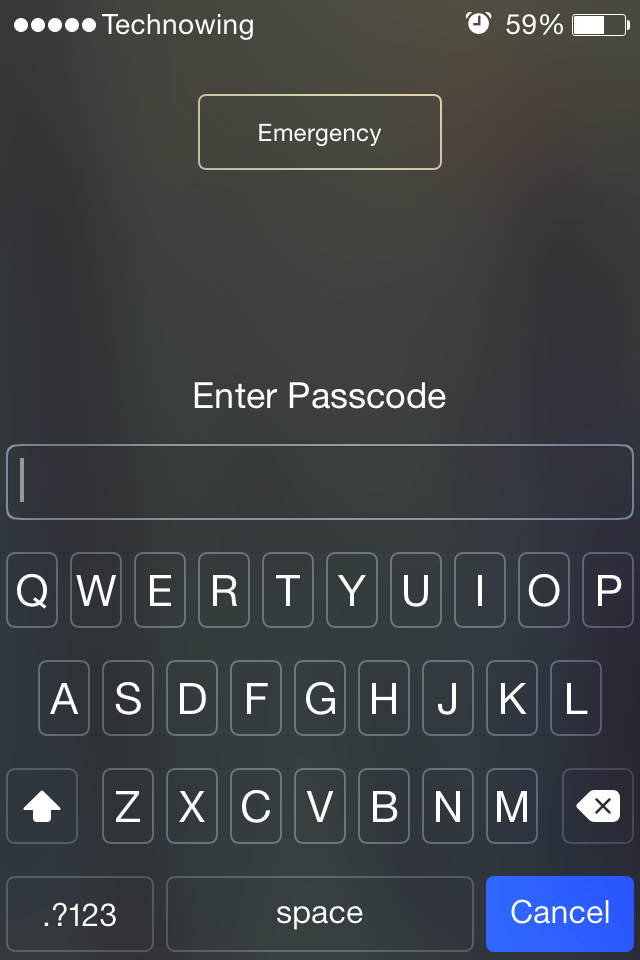
Here's the preview of lock screen menu.
In future, I will write an article on how you can reset your iOS forgotten passcode.
Was this post helpful for you? Please share your views with us.
If you have any queries or suggestions for us, please forward them to us. If you find your site worthy, subscribe us and share it with your friends.

Sometimes, you might delete your files accidentally and want to recover that specific files as it may hold significant importance to you. Recovering your deleted files is quite simple process and for that you need to have some softwares. In this post, I will show you, how you can recover your deleted files easily. I will be showing you to recover your files using two softwares:
1. EaseUS Data Recovery Wizard 8.6 (Paid)
2. Recuva (Free)
You can recover your files using this softwares from any drives, SD cards and even USB drives.
There are many other software both free and paid to recover your files.However, I will only be discussing about those two mentioned above as I would prefer them over others.
Note: If you delete your files from your hard drives, then it will go to Recycle Bin ( unless you delete it permanently). You can easily restore your files from there. However, to recover your files from SD cards and USB drives, you still have to use recovery software.
Lets get started..
Method 1:Using EaseUS Data Recovery Wizard 8.6
Step 2: After the download is finished, launch the setup and install it. You might see Spanish language during installation. Don't worry just install it and later you can change the language.
Step 3: Now, after installation is finished, launch the application. You can change the language from Spanish to English as shown in figure below:

Step 4: Now, select the files type you can to recover and Click Next. For this tutorial, I am going to recover Graphics, Audio and Documents.

Step 5: Select the Drive from which you want to recover the files you accidentally deleted and click Next. You can only select one specific drive. I will be recovering my files from my pendrive TECHNOWING.

Now the scanning process will start as shown in figure. I must say that this software scans very fast and results are really reliable.

Step 6: After the scanning of files is finished, it will show you the lists of files you can recover. If you are not statisfied with the result, you can select Deep Scan. Here's the preview:

Step 7: Now, select the files you want to recover and click on Recover.
Remember, in trial version, you can only preview the files but cannot recover them unless you buy the license.

You can buy the premium version for $69.95 for Windows and $89.95 for Mac.

I have bought the premium version, so I will be continuing the further step.
Step 8: (I am assuming you have paid version) After you click on Recover, then you have to select the destination where you want to save your files. I saved my files in Technowing folder.

After the recovering of files is finished, a new window will appear showing you the recovered files.

Conclusion: This app user interface is really clean and easy to use. The speed of scanning the files and recovering files is very fast. Besides, it also has deep scan feature. So, if its in your budget then I would strongly recommend to go for this software.
Method 2: Using Recuva
Step 1: At first, download this free app: Recuva
Step 2: After the installation is finished, launch the software. A similar (shown below) will appear. You have to select the file type you want to Recover and click on Next. Here I will go with 'All Files' type.

Step 3: Then you have to specify the drive from which you want to recover your deleted files. There are six different options available for you. Select one option and click on Next.

I will be recovering my deleted files from my pendrive TECHNOWING.

Step 4: In next step, make sure you check 'Enable Deep Scan' for more reliable search results and click on Next. However if you want fast result, then there's no need to check that option.

Now, it will take several minutes to gather the results.

Here's the final result of Deep Scan.

Step 5: Now select the files you want to recover and click on Recover.

Step 6: Select the destination to save the recovered files.

At the end of recovery, it will show a dialog box as shown below:

Conclusion: This software is really good and provides with different options from where you can recover your files and also has Deep Scan features. This software is available for free. If you can't pay for premium recovery software then I would definately suggest you to use this software.
Was this post helpful for you? Please let me know through your valuable comments below.
If you have any queries or suggestions for us, please share them with us. If you like my posts, please share them with your friends.
Subscribe to:
Posts (Atom)
Visitors

Popular Posts
-
 Hey friends , if you interested to learn C/C++ in you android device then CppDroid can help you. By using this app you can easily write...
 -
 In the recent times,backing up the files online is the latest way to store the personal files and folders.Files stored in cloud are more se...
 -
 At present, it's better to learn different languages so that it can be helpful for you. Besides, your mother tongue you must be much...
 -
 Are you guys looking for PC games? As it is known to you that in today’s world 3D gaming has earned much popularity in different platfo...
 -
 There are many apps that provide free calls by offering free credits. However, after the free credits are over you need to purchase the cr...
 -
 Hey Guys! Welcome to the new tutorial. In this , you will learn to create a password protected software without any software. Most of us, ...
 -
 If you own an iOS device, then you must know that by default you have to set 4 digit numeric passcode. But there is also a feature availab...
 -
 Were you ever eager to know the saved passwords in your iOS device ? Sometimes you might also want to know the passwords that your pare...
 -
 Microsoft's Windows 7 ,released on July 22,2009, was a great success and was largely accepted by its user worldwide. After few years, ...
 -
 I love the way the Windows Start Menu allow me to access the applications easily in My PC. Have you ever wish for search Start Menu for you...